A Modern Cassette Tape Shelf
When I started looking for ways to store my cassette collection, everything on the market looked like it came straight out of 1987. The options were either clunky plastic drawers that you had to pull completely out just to see the tapes in the back, or those wall-mounted display racks that hold each tape in its own little slot. Both designs made it awkward to actually grab the tape you wanted — there was never enough space for your fingers between them.
So I decided to design and build my own.
The Concept
I wanted something clean, functional, and compact — a shelf that showed the spine labels clearly, like a row of books, while also letting me access any cassette quickly.
Each shelf needed to hold a lot of tapes (34 per row) but still feel minimal and solid on the wall.
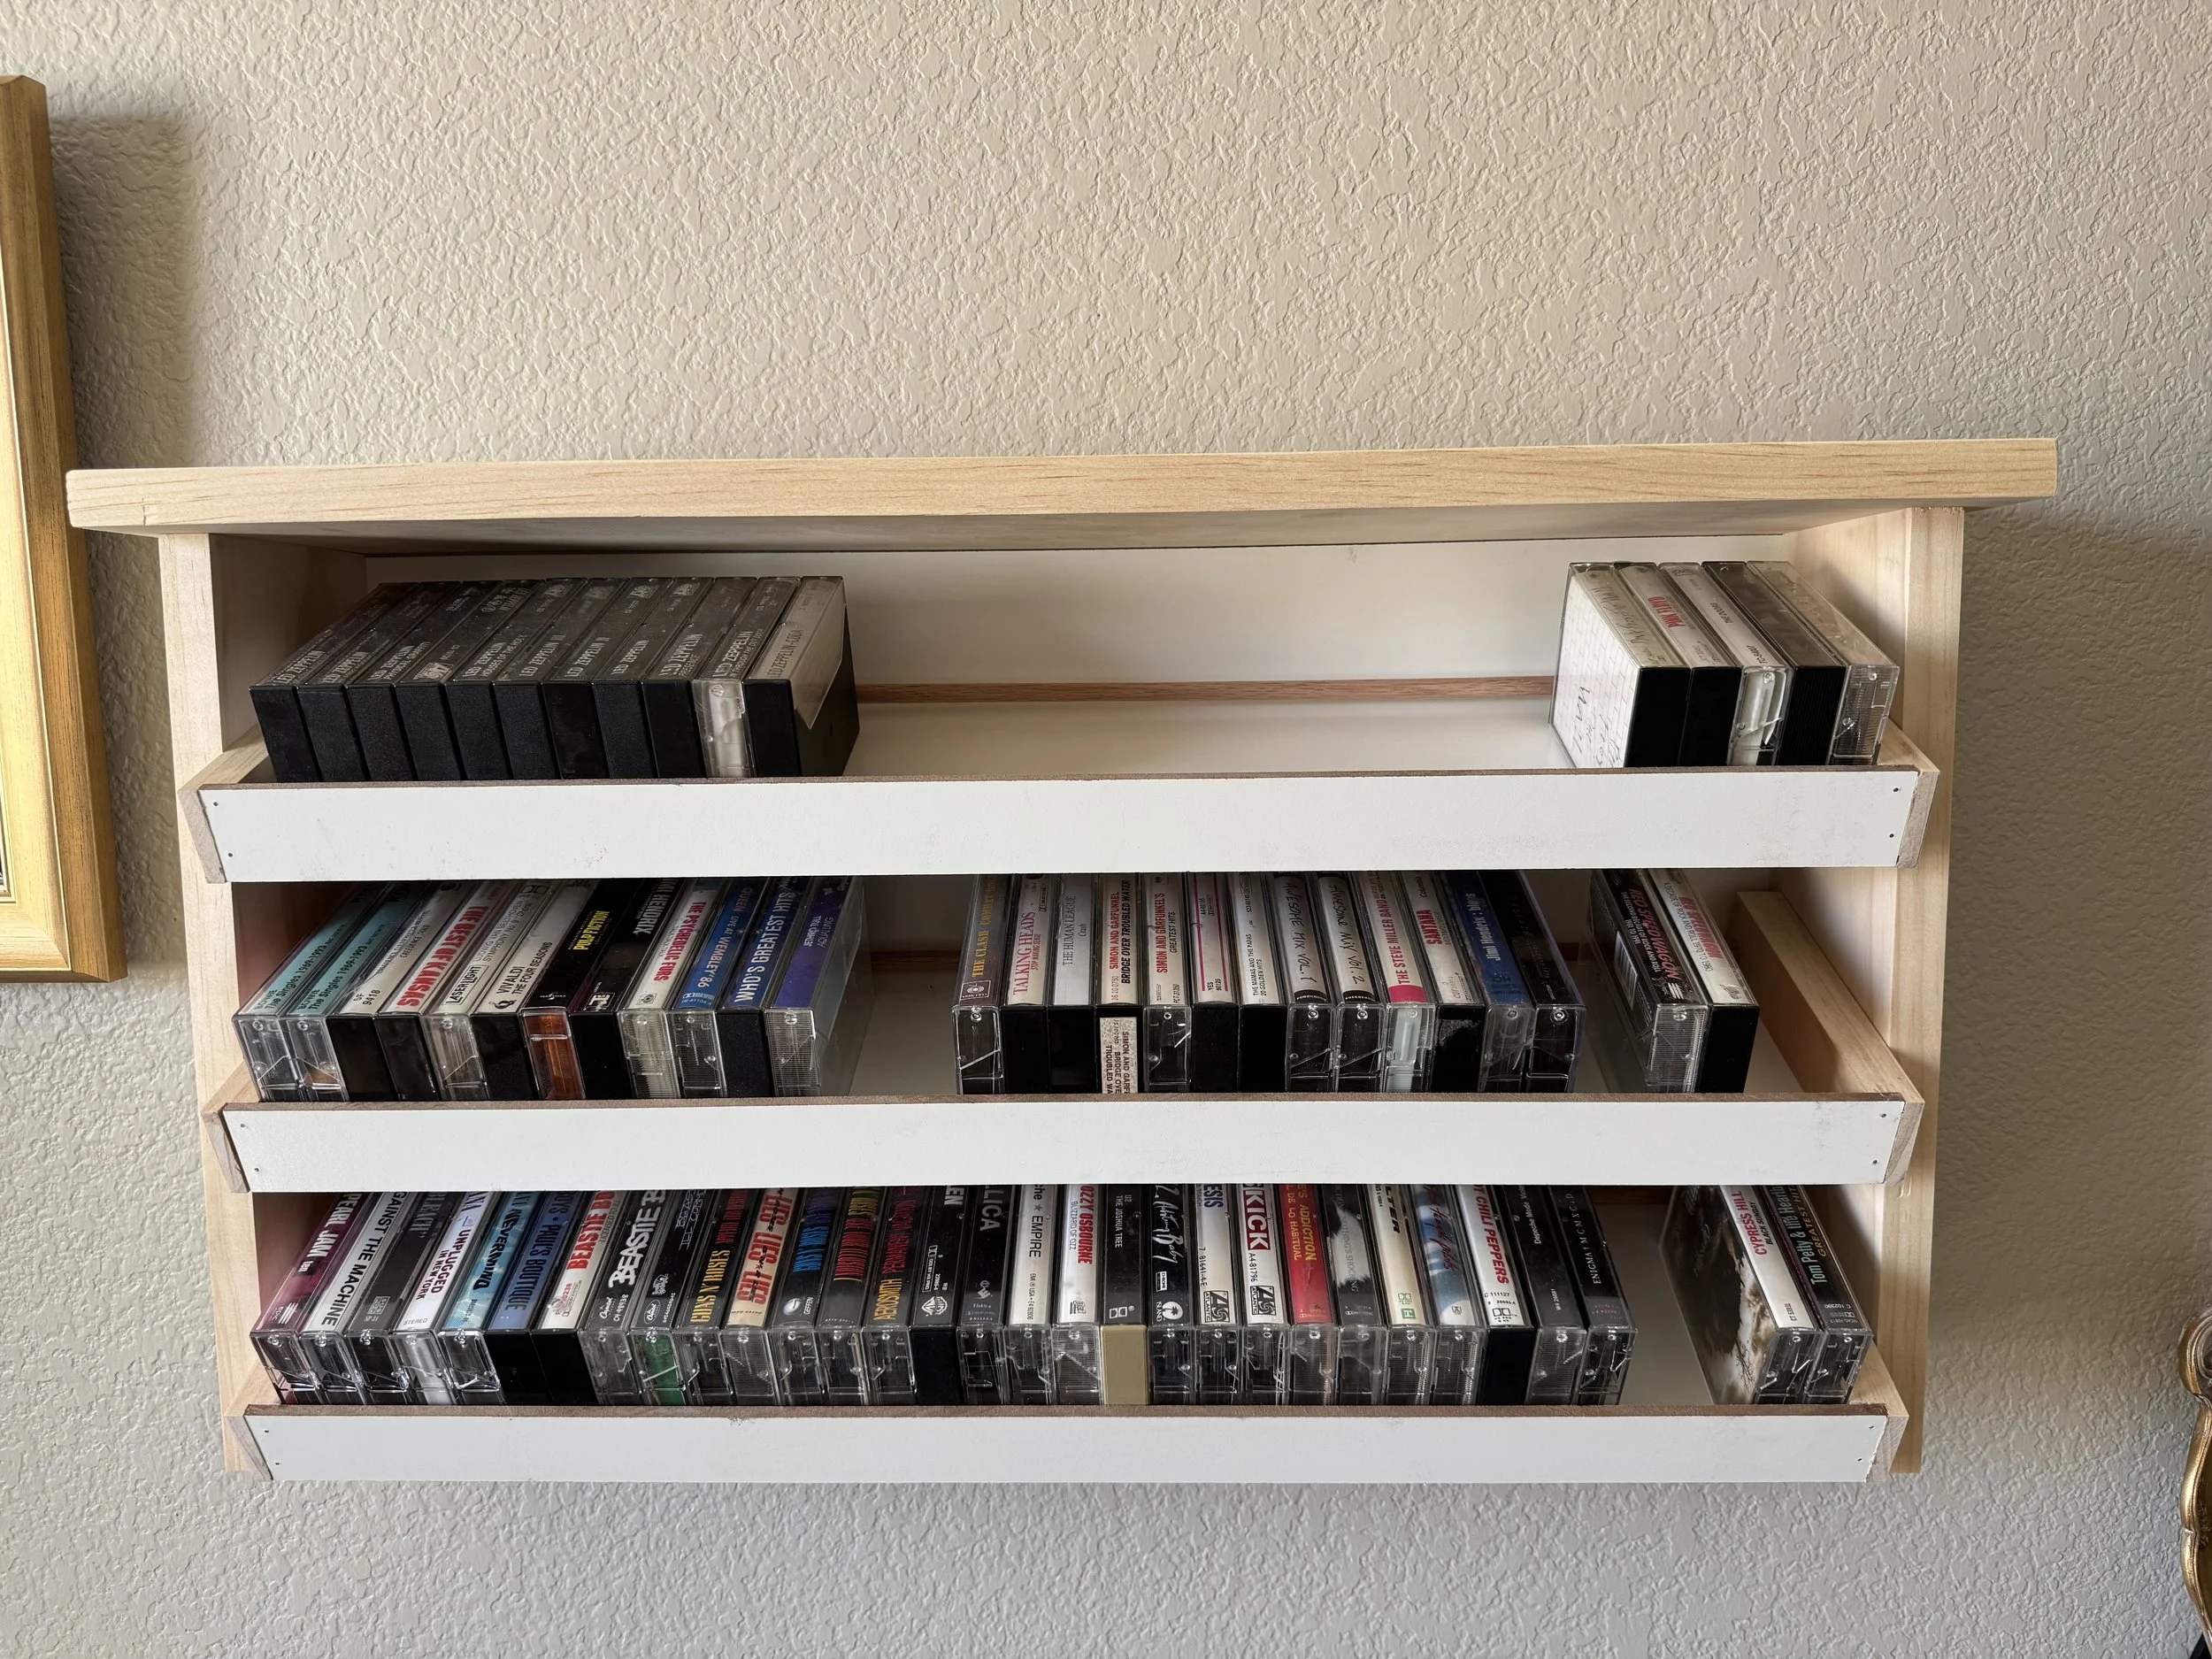
The solution was to store the cassettes sideways, spine facing out, and to make pull-out shelves that slide forward for easy access. You can remove a single cassette by tilting it back and lifting it out, or you can pull the entire shelf forward and down to see and grab everything at once.
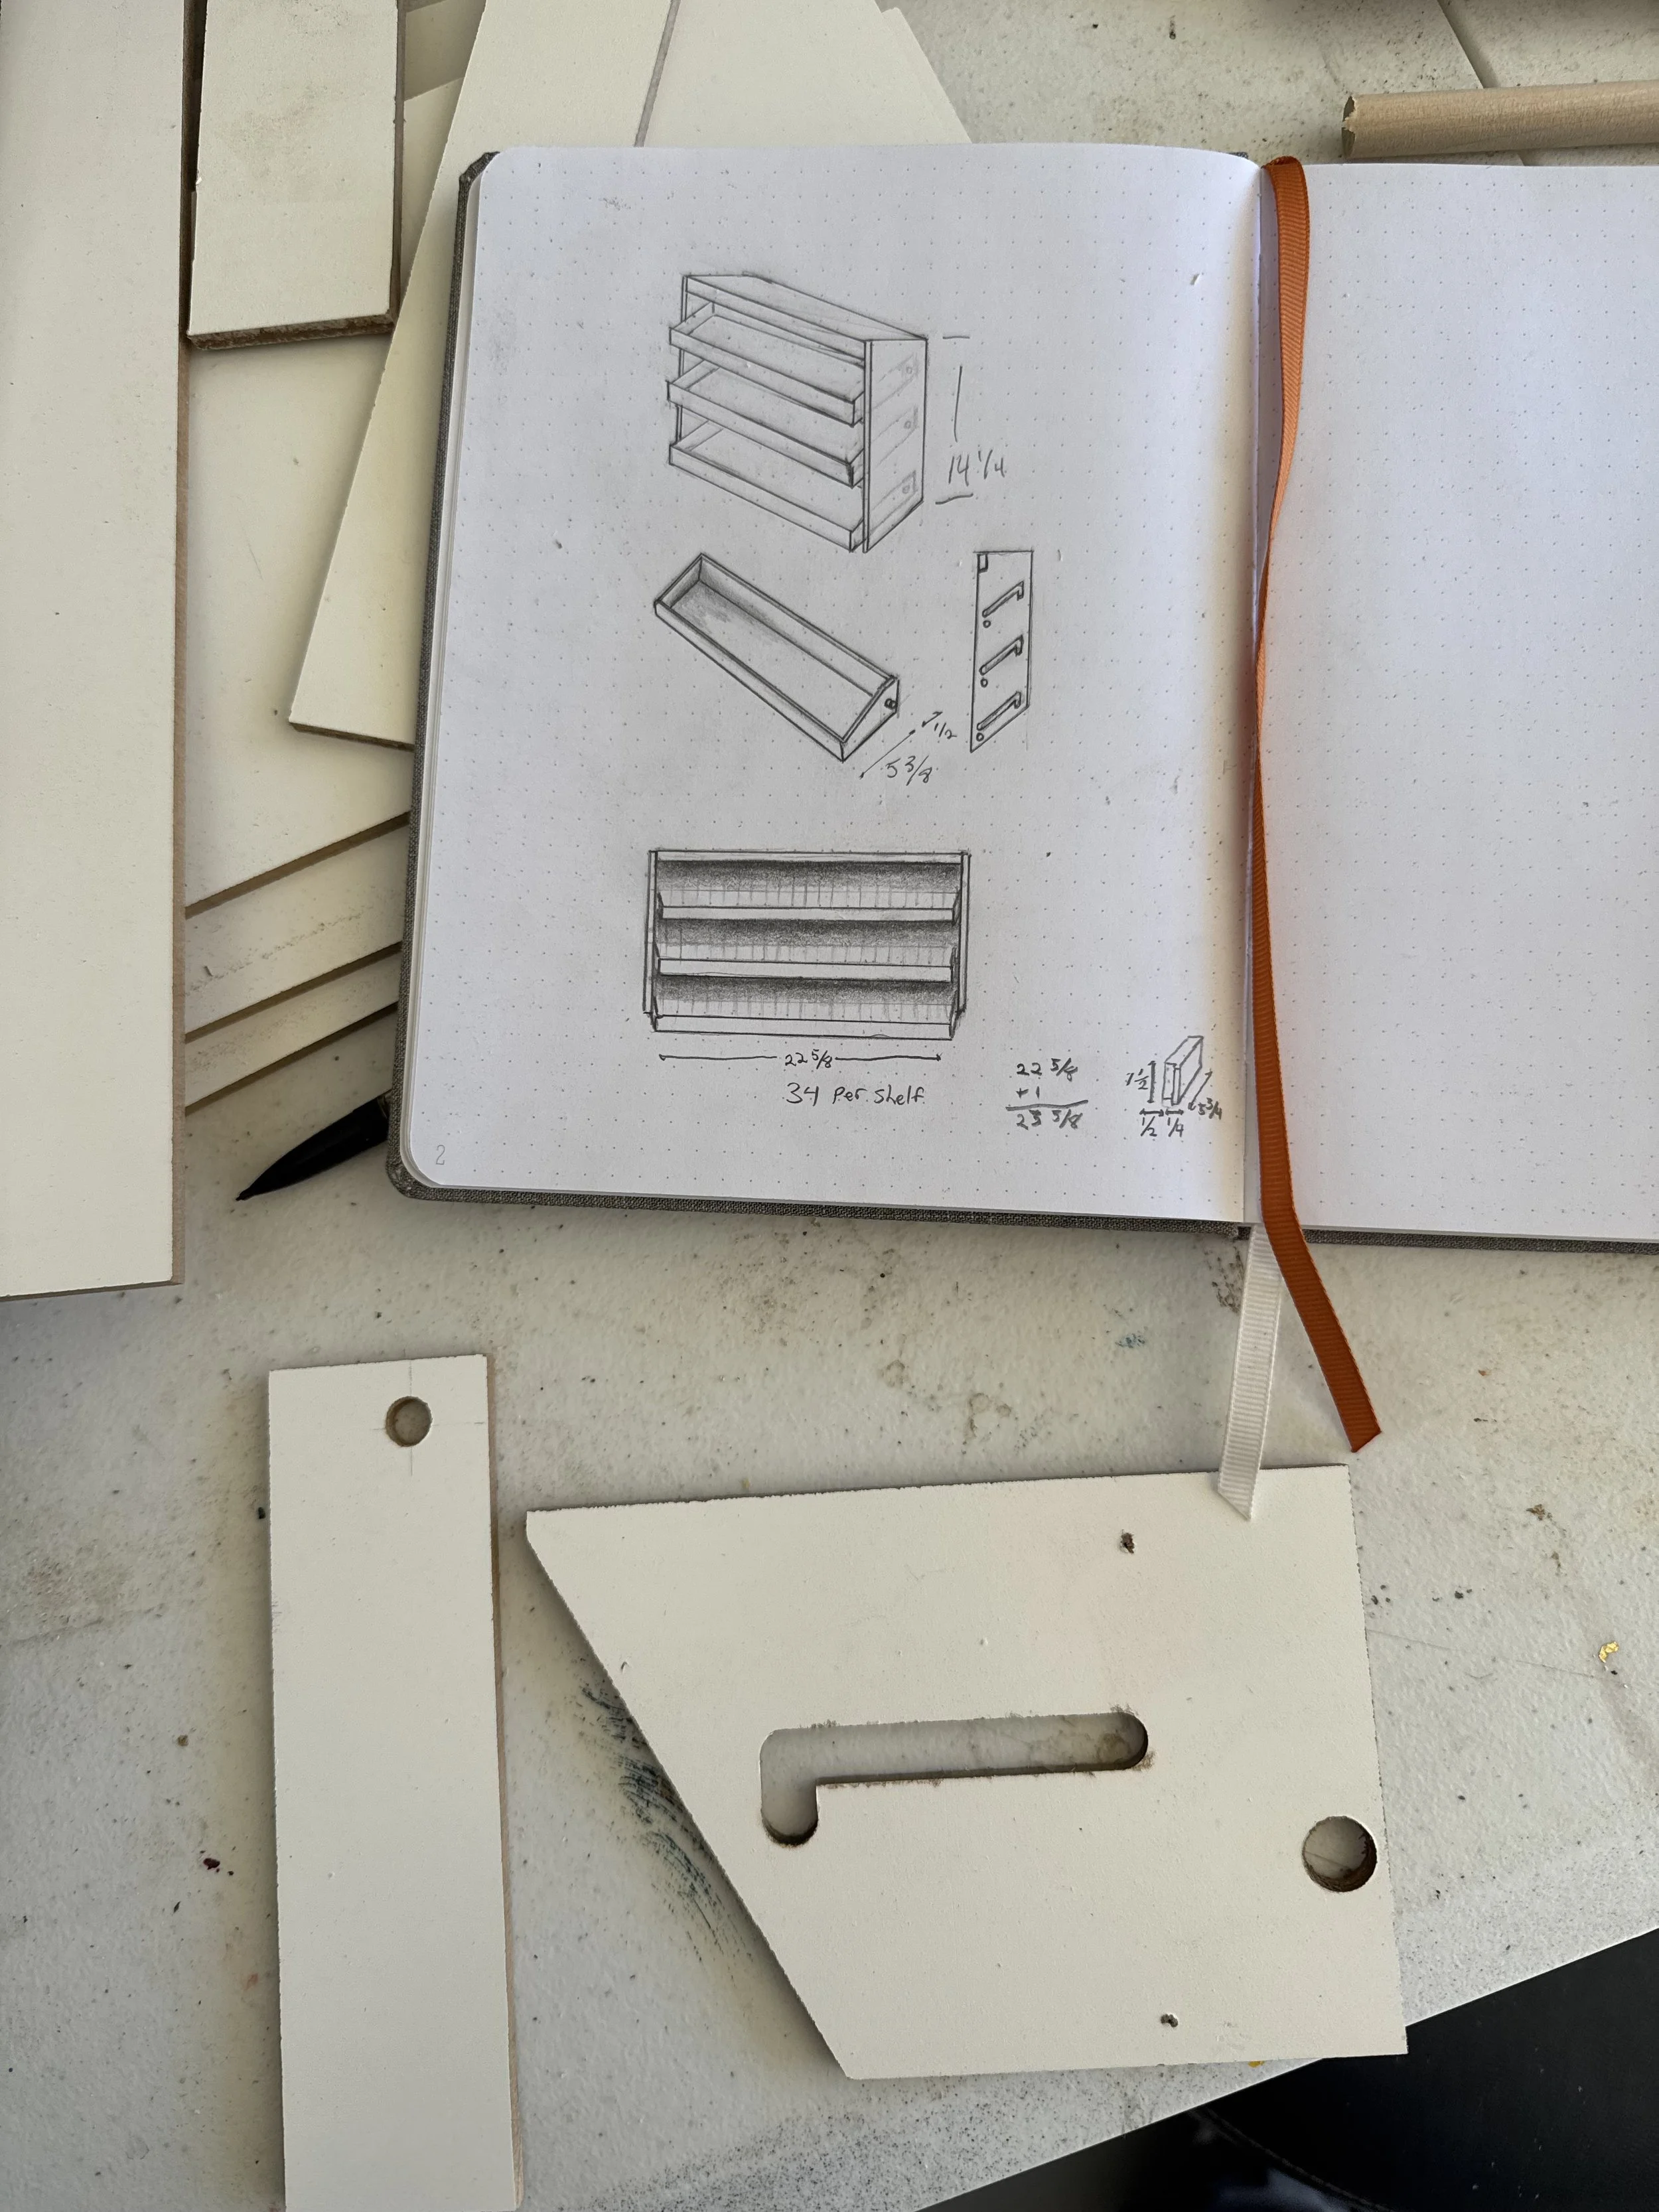
Design Sketches
I began with a few quick pencil sketches to work out proportions and joinery.
The final piece measures about 14¼" tall, with each shelf about 5¾" deep and a total width of 22⅝".
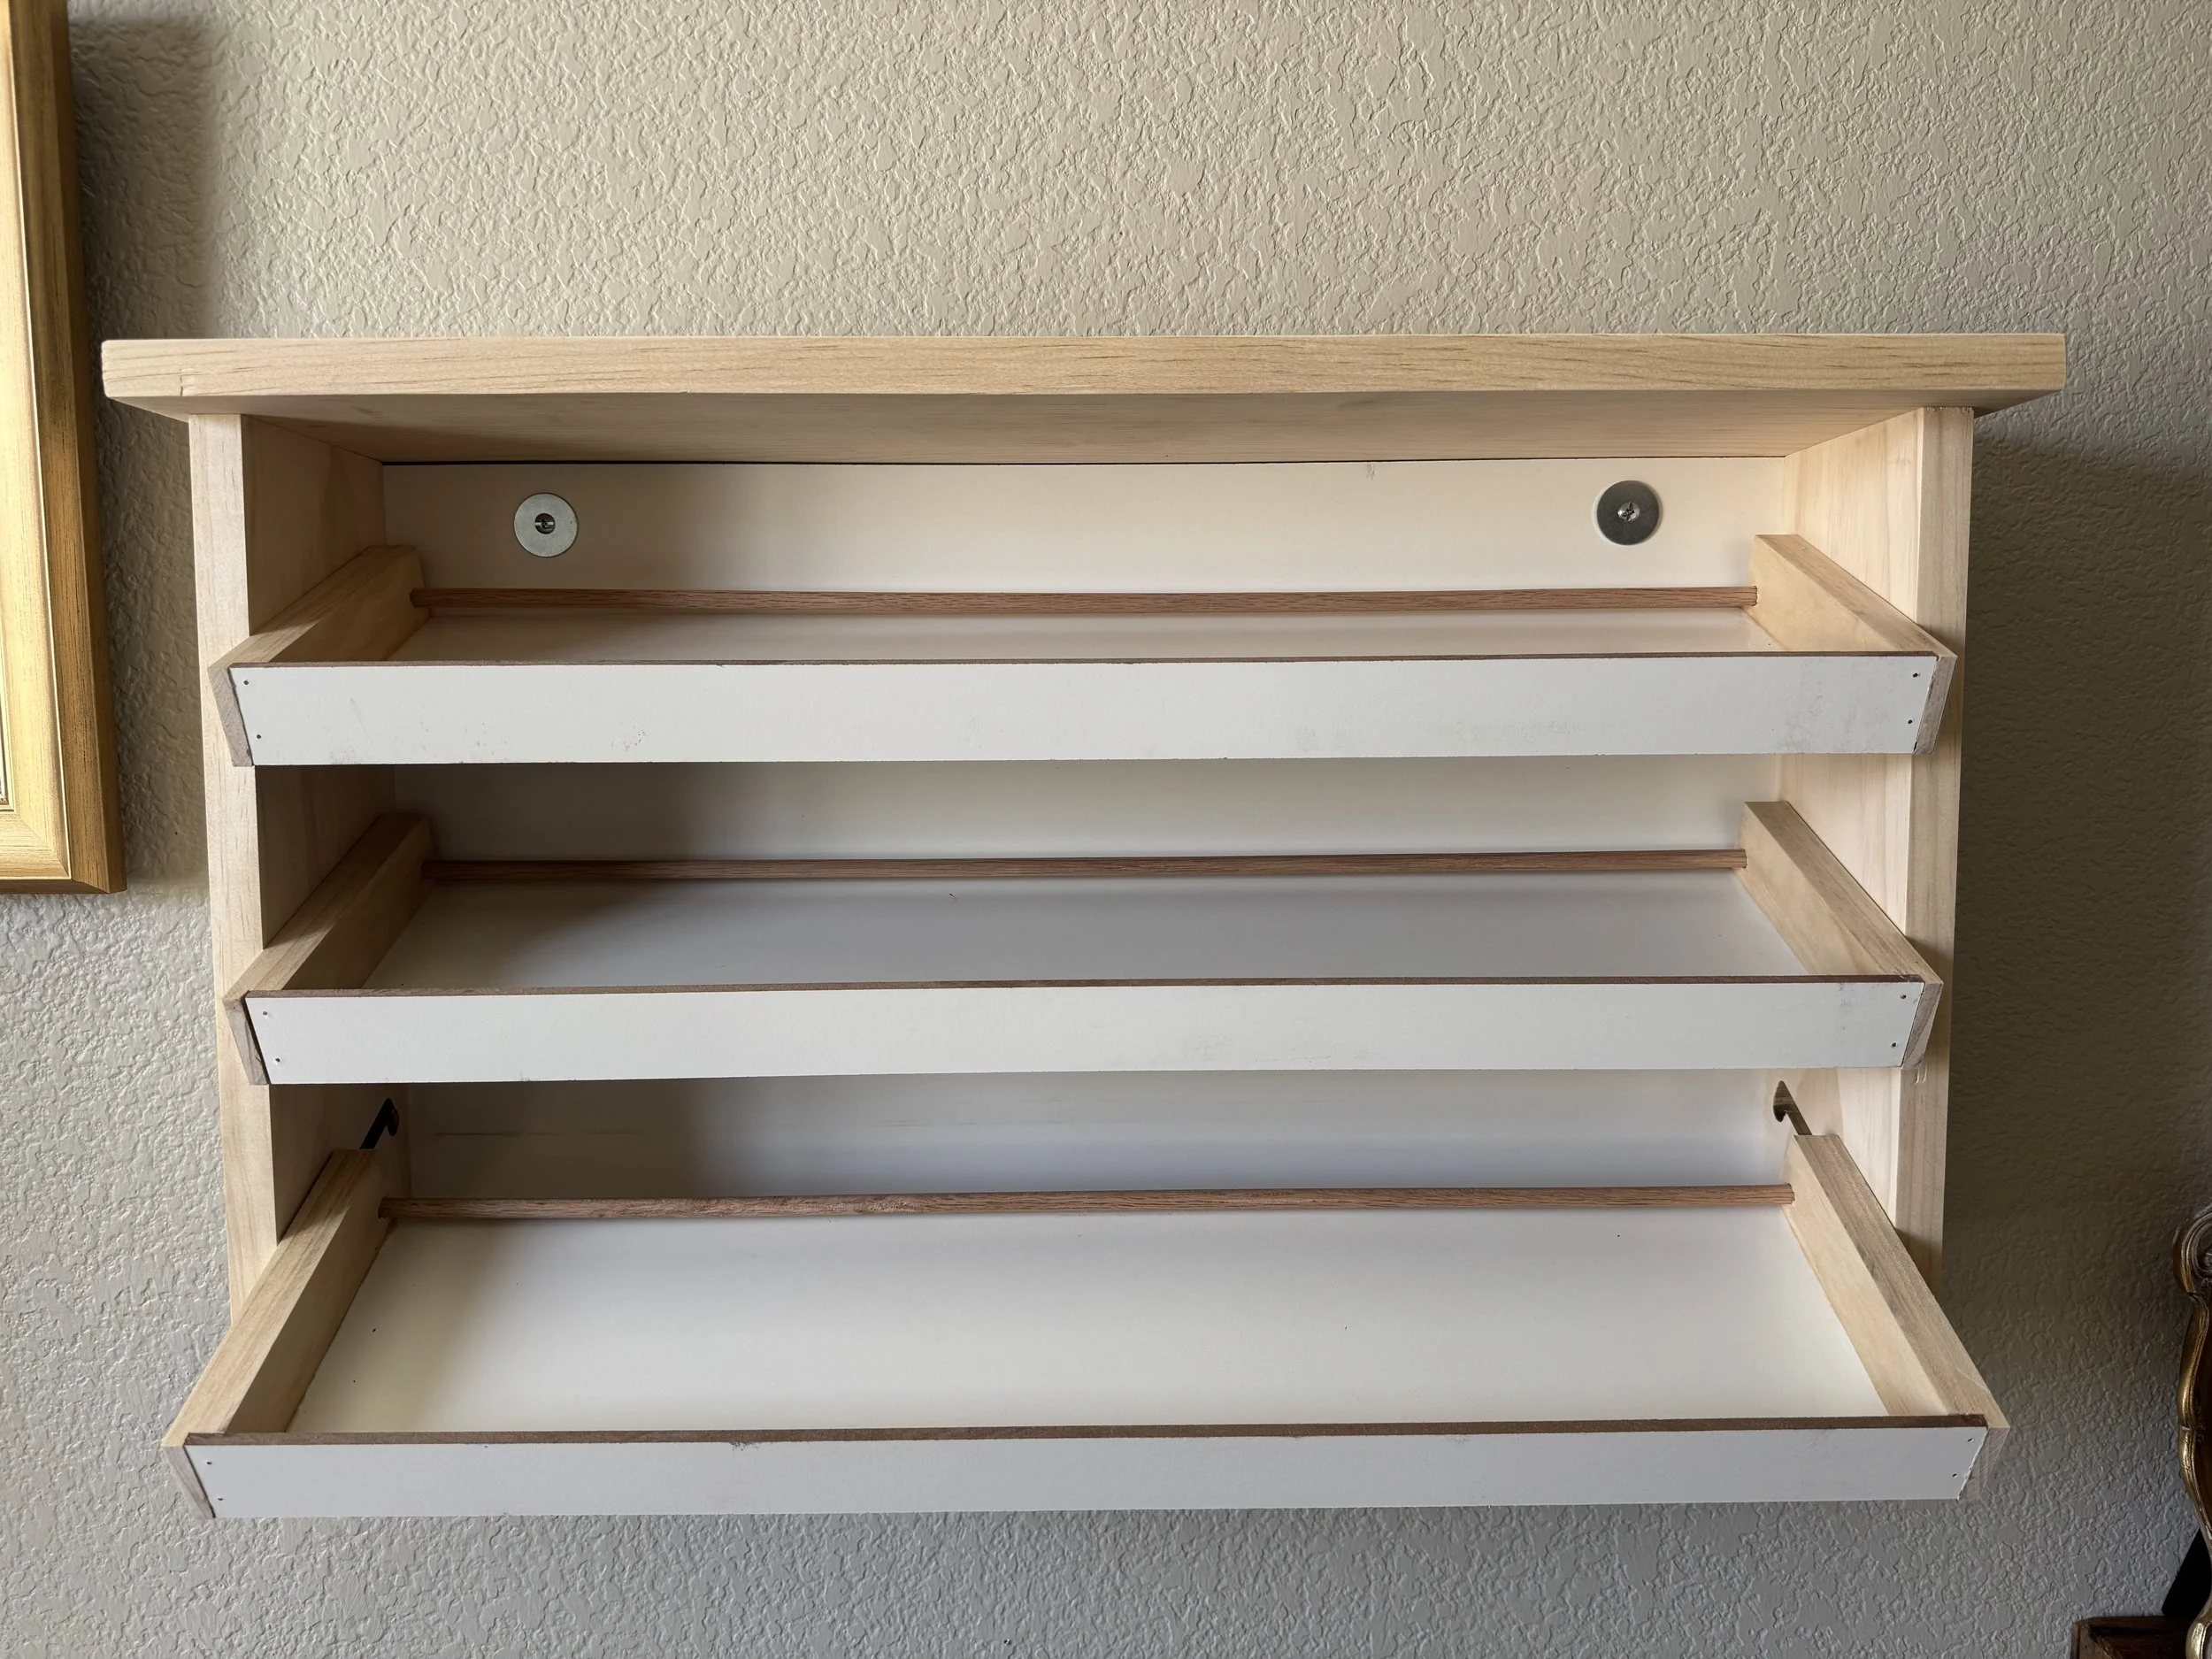
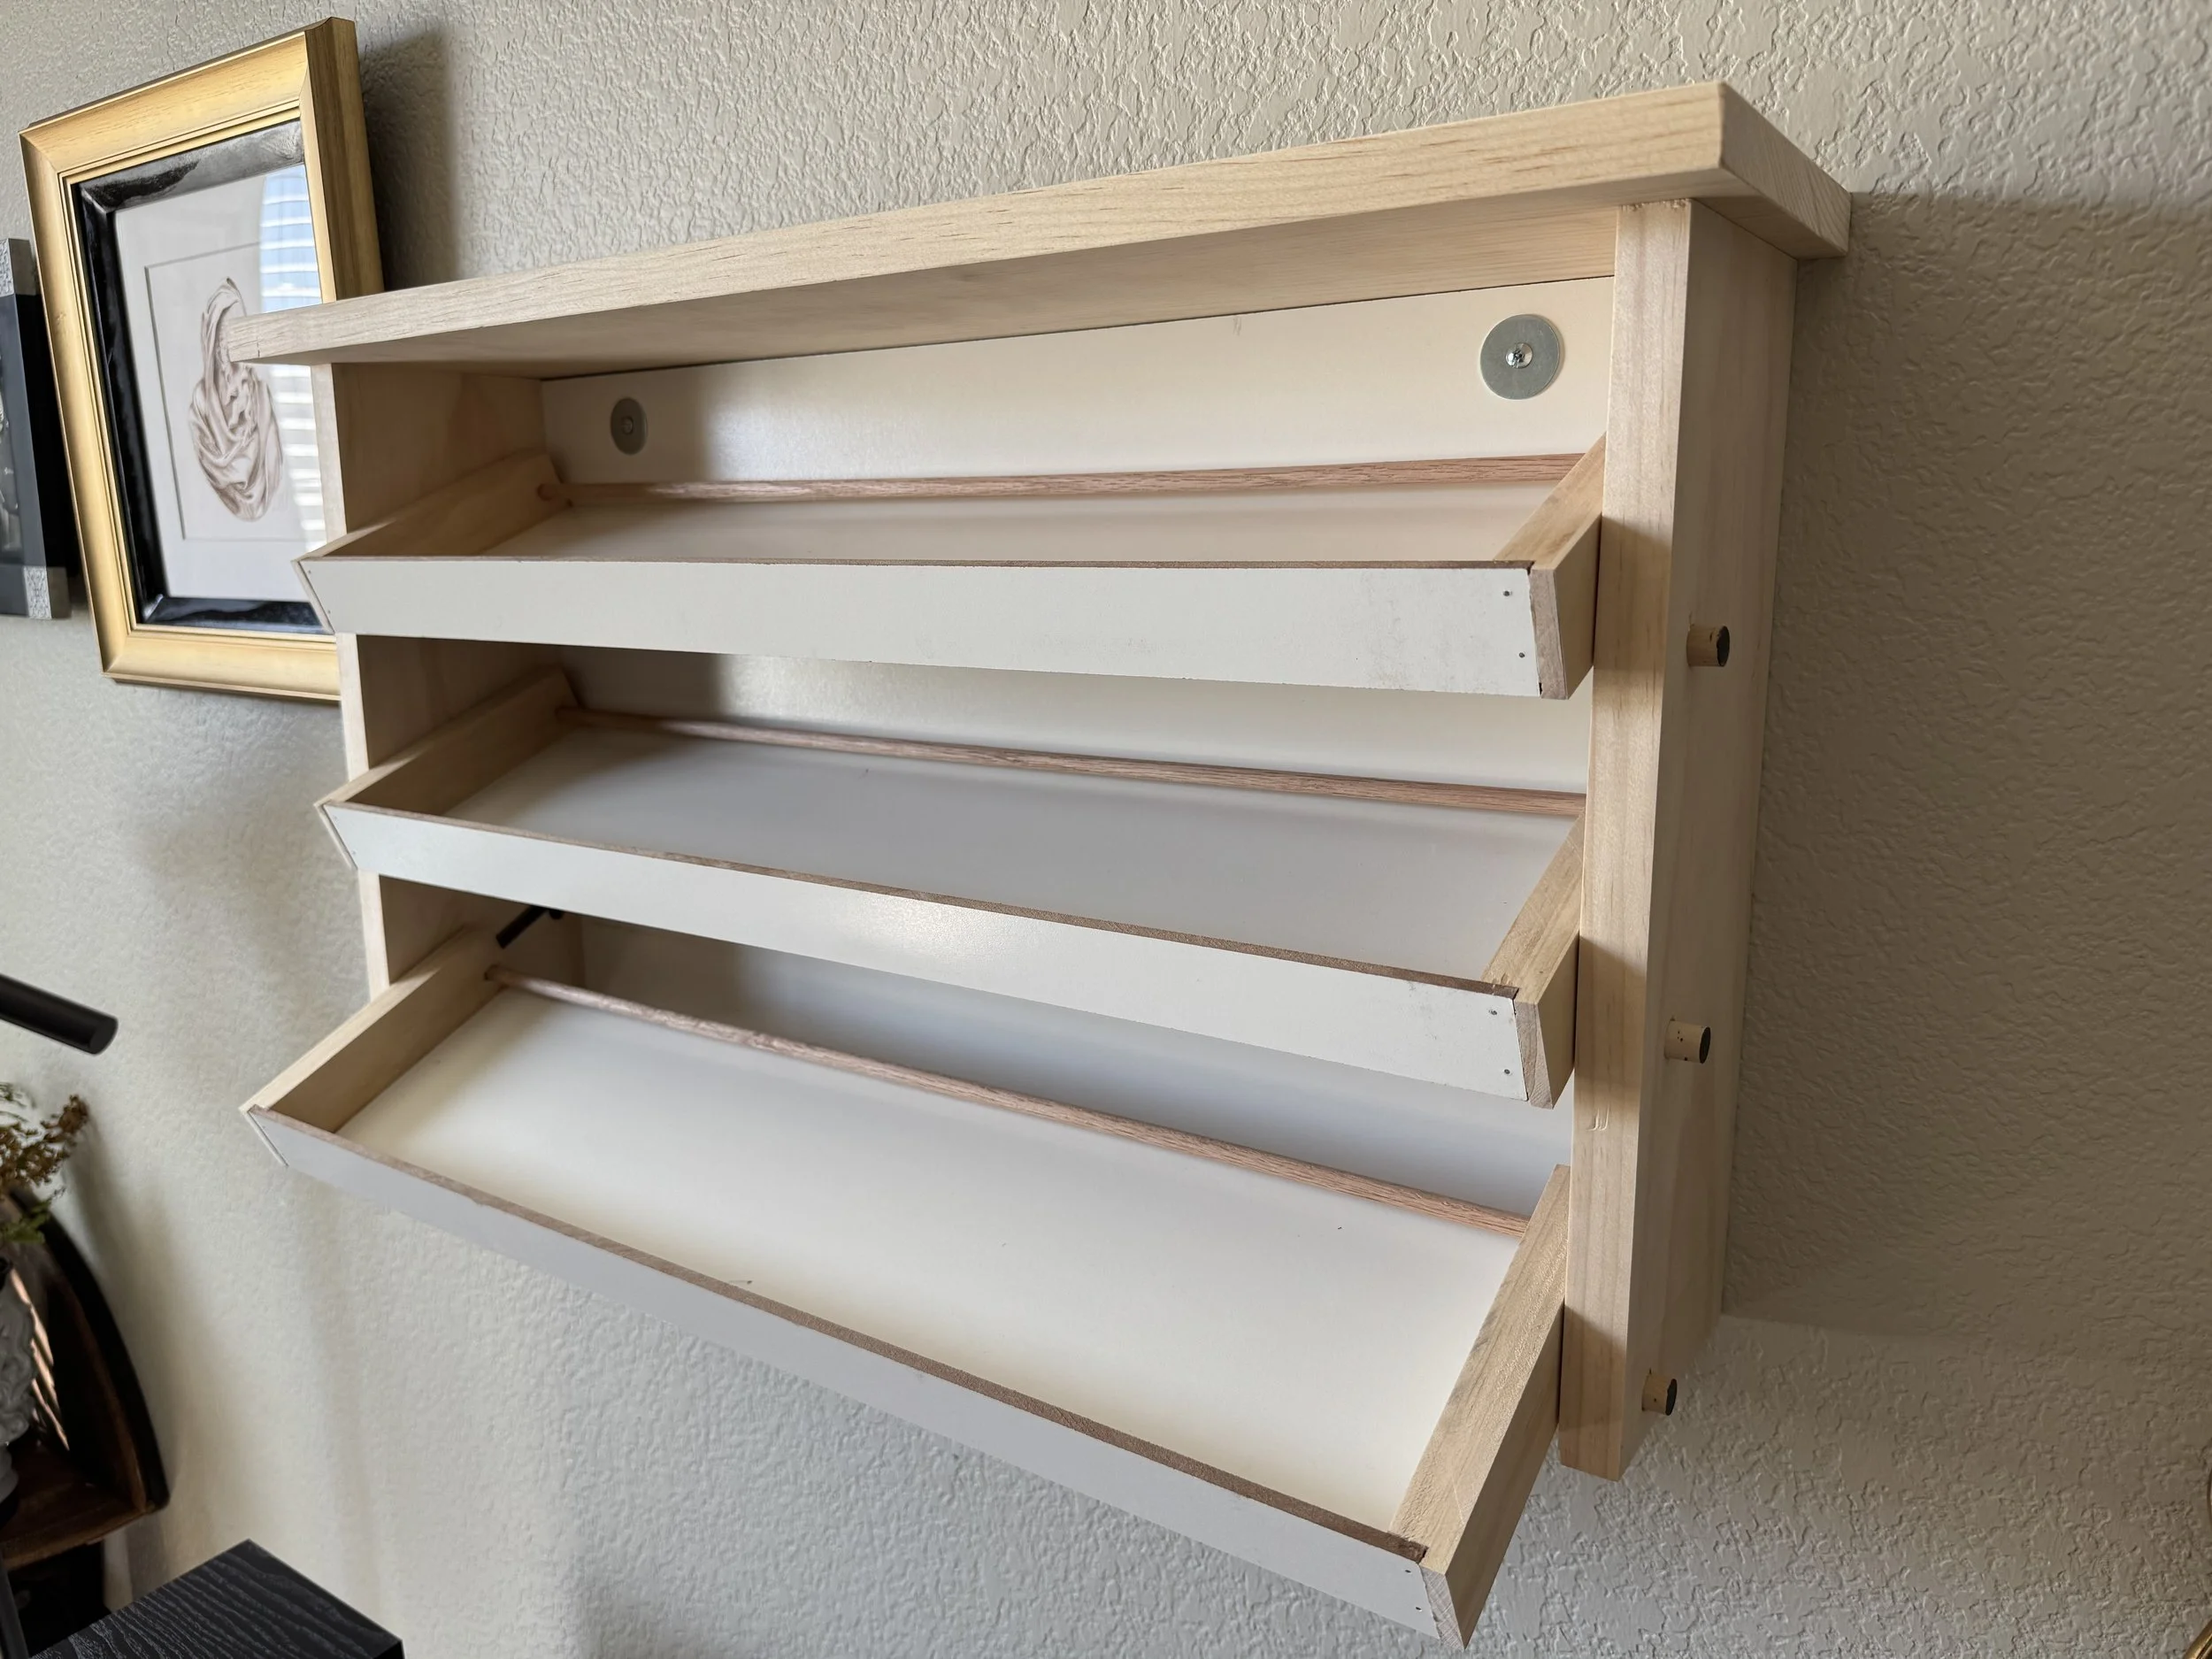
The side panels are slotted to hold three pull-out shelves, each locked in place using a simple routed slot mechanism.
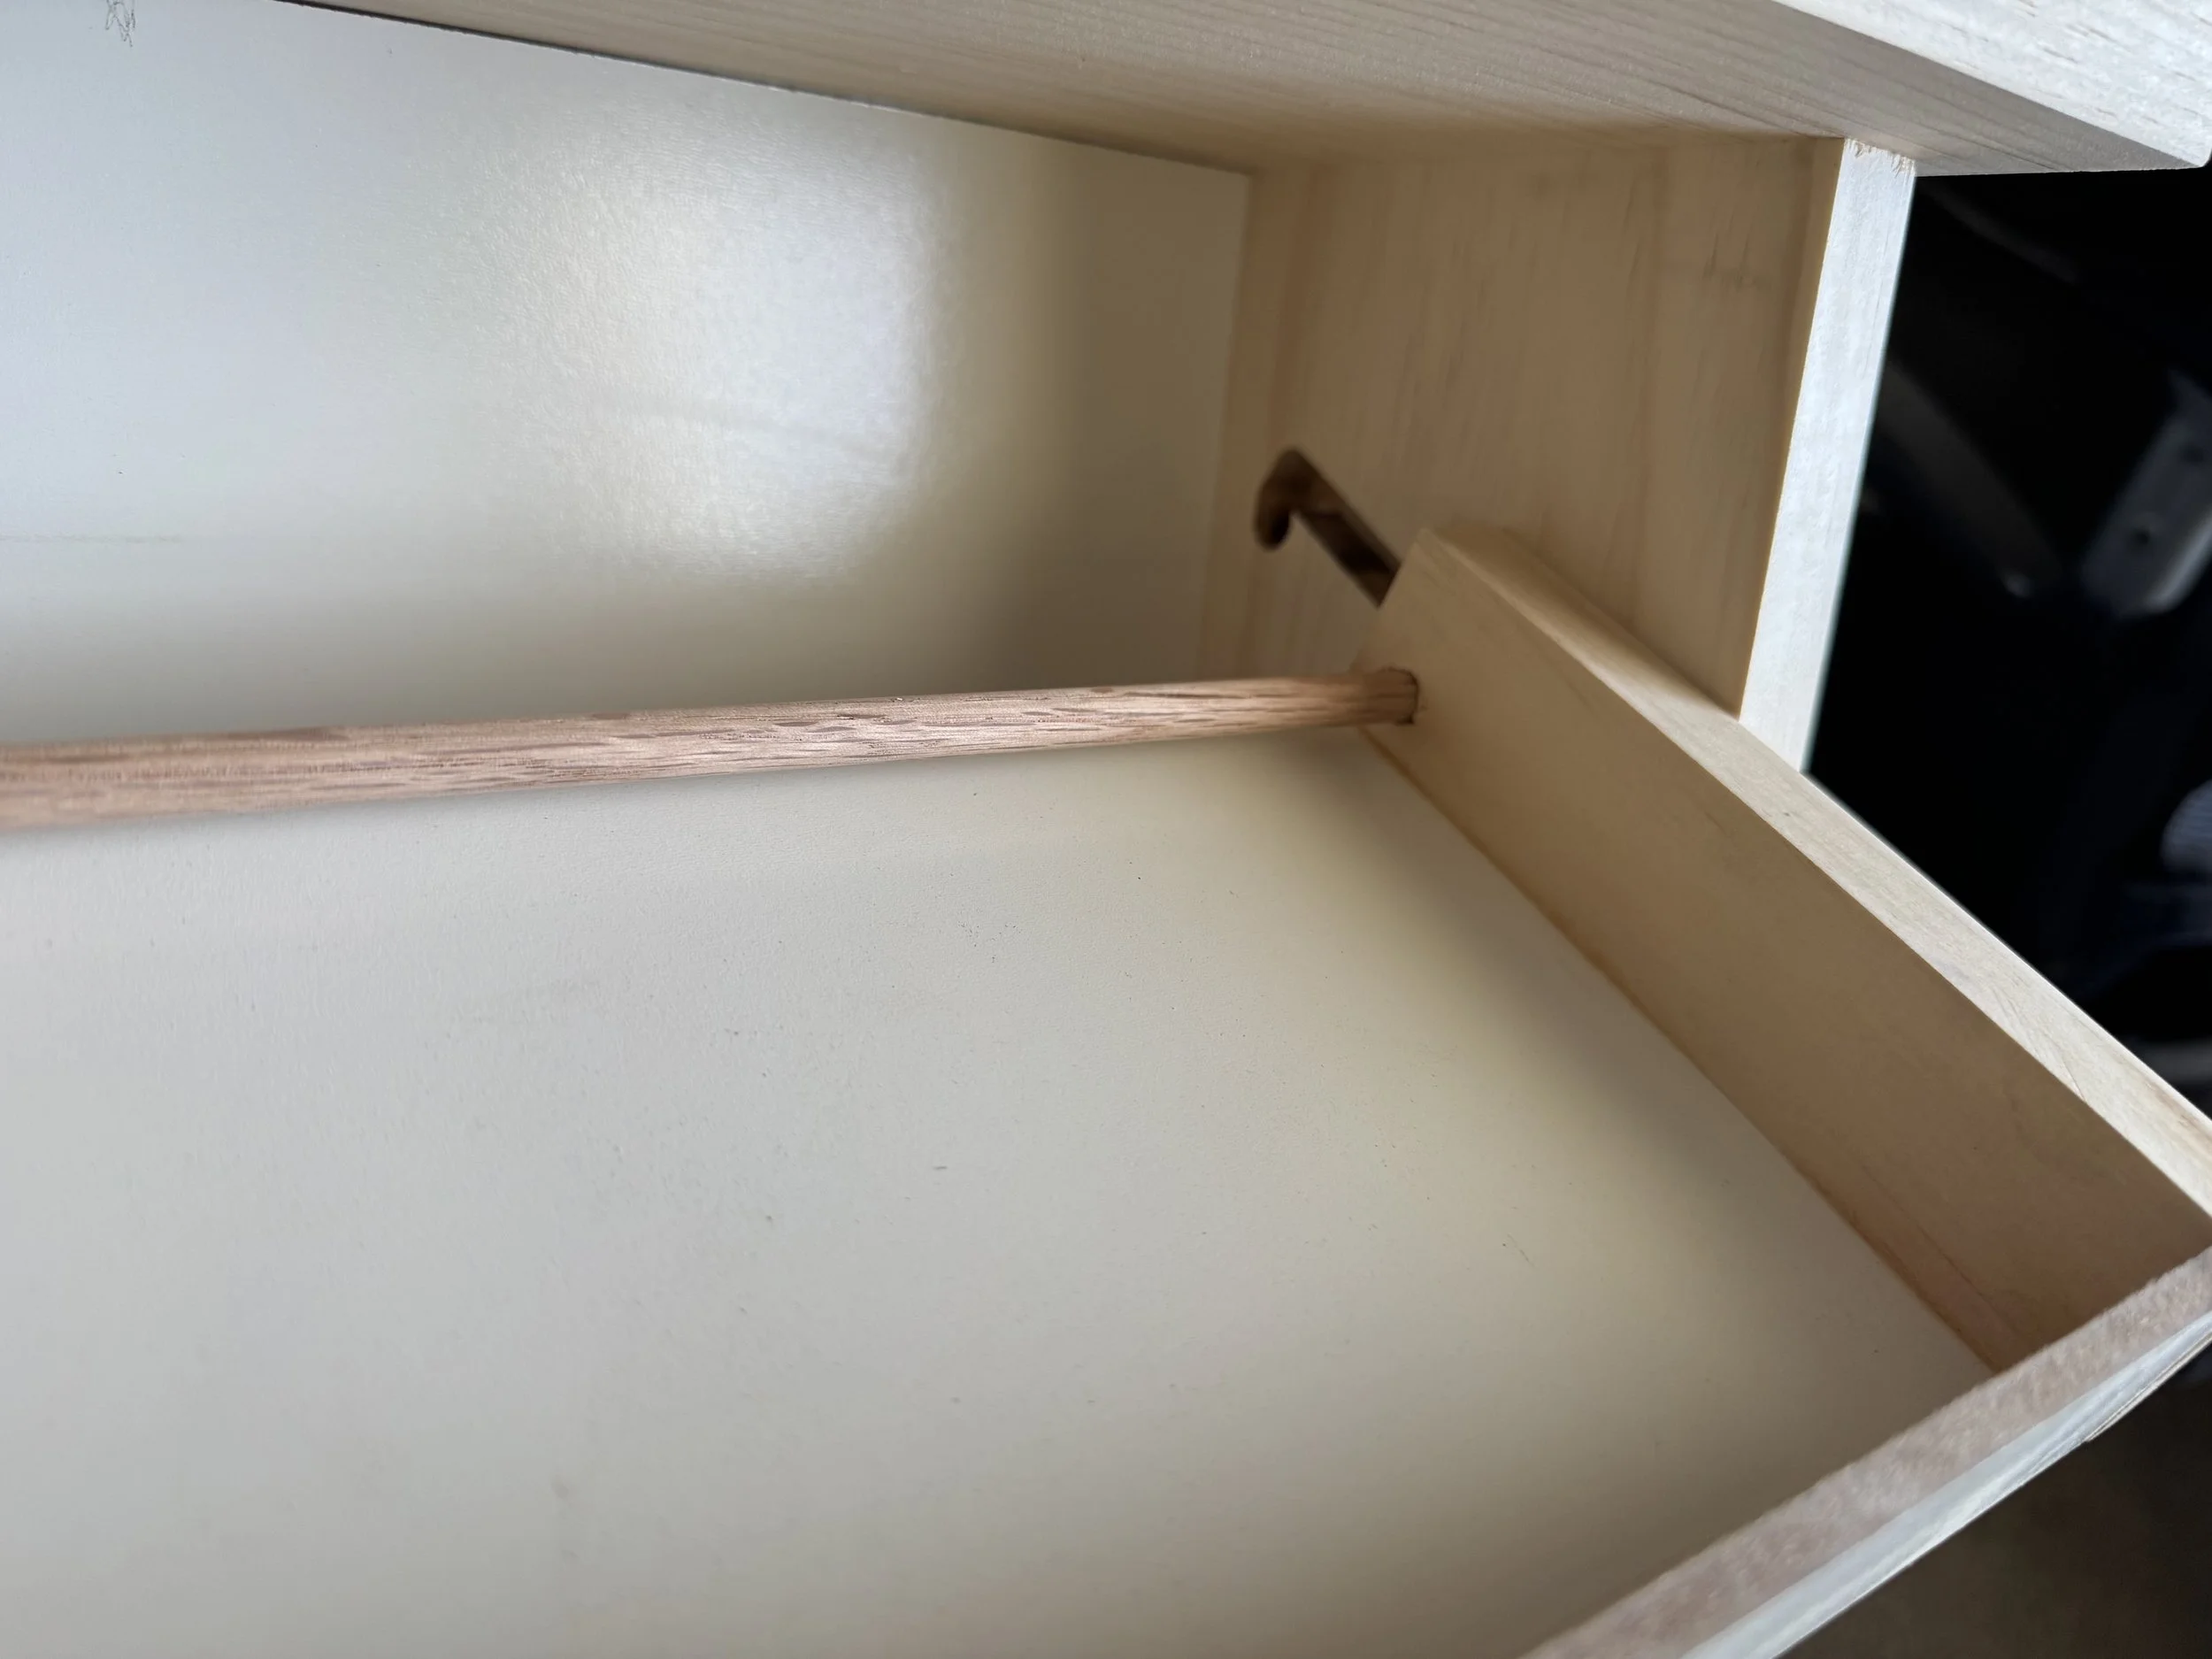
Router Template and Shelf Mechanism
One of my favorite parts of this build is the custom router template I made to cut the shelf tracks.
The slot is shaped like an “L,” which allows each shelf to slide back and then drop down into a locked (closed) position.
The short “leg” of the L locks the shelf back into its closed position using nothing but gravity and geometry — no hardware required.
Each shelf rides on wooden dowels: one set embedded into the sides of the cabinet, and another set that passes through the shelf sides themselves.
These dowels not only act as structural guides but also create a satisfying, visible design detail when viewed from the side.
Building the Shelves
The shelves themselves are made from lightweight pine with composite wood fronts and oak dowels for strength.
The sliding motion is smooth but secure — the shelf can’t accidentally slide out on its own.
I left the side dowels slightly proud of the frame as a deliberate design choice to make them visible and tactile.
The Finished Piece
Mounted on the wall, the shelf feels solid but minimal.
It fits perfectly into a small space while holding more than 100 tapes across three levels.
You can see all the album labels at once, and when you want to play one, it’s as simple as tilt-and-lift — no plastic drawers, no digging.
Reflections
This build is a great example of how a small design tweak — orienting the tapes sideways and adding sliding shelves — can completely change usability.
It’s a simple piece, but it solves every frustration I had with the older designs, and it looks great on the wall.